31 Jan 3 + 1 Styling Projects You Can Work On This Weekend
The quickest way to give your space a boost is by styling it (whether you are updating the style or assembling styling elements for the first time). I have jotted down a few ideas to help you get started this weekend. The good news is that you can use items you have already or if you really want to go for it, I have also suggested a few items for purchase to reinvigorate the space.
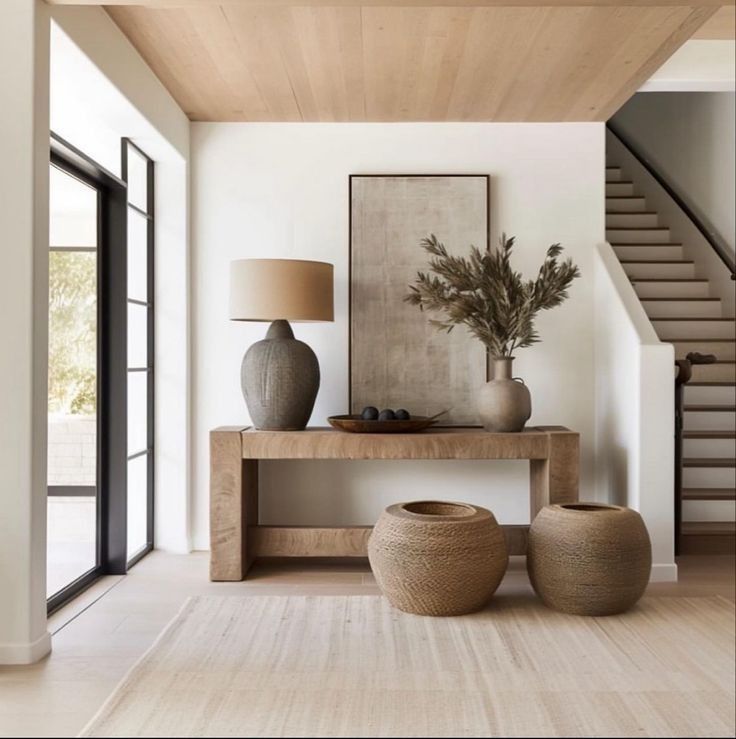
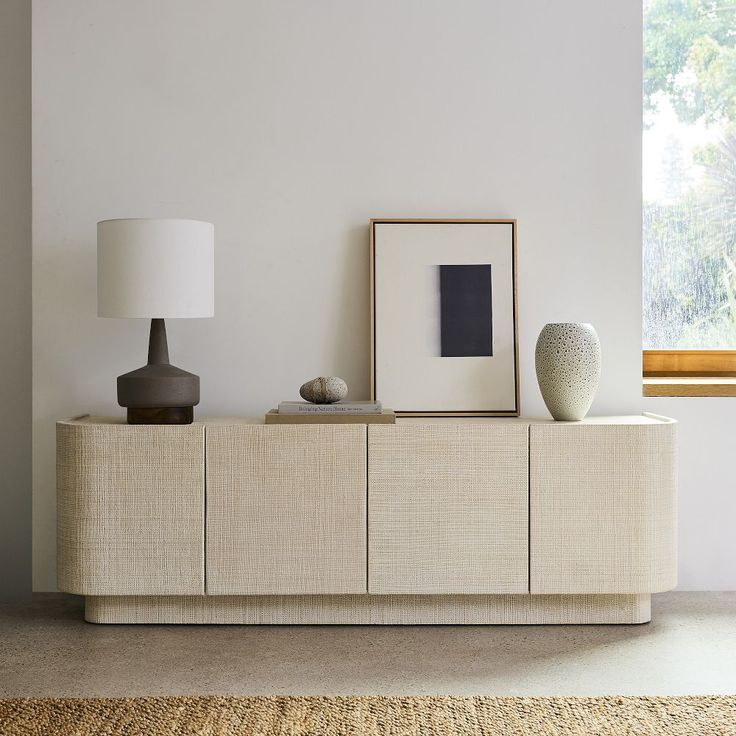
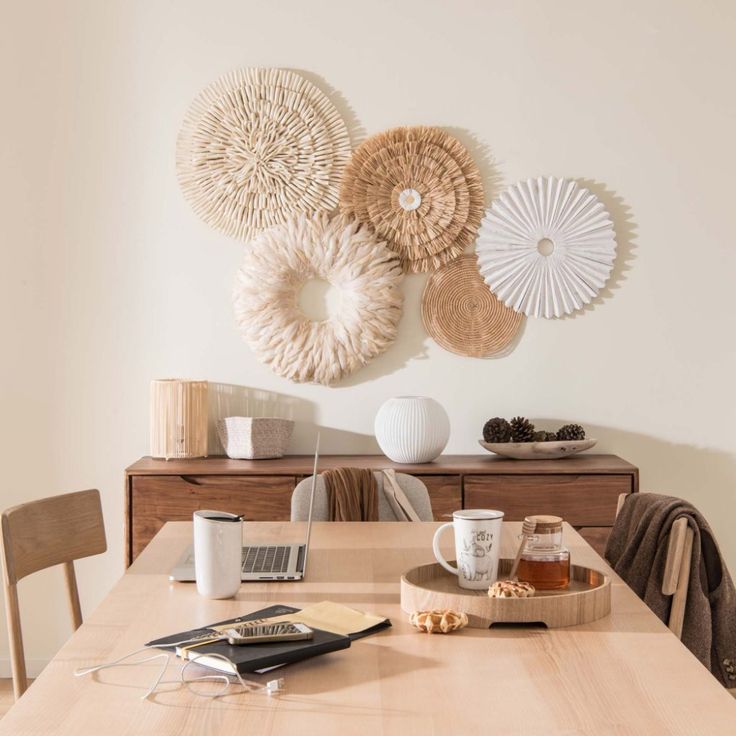
1) Show Some Love To Your Sideboard And/Or Console Table
Your sideboard and or console table are two of the most versatile pieces of furniture in your home. They are practical and decorative at the same time – however they often end up being the ‘dumping ground’ for keys, magazines, bags, piling knick knacks and TV remotes.
I would advise to start by removing EVERYTHING, including any mirrors or artwork above it. Give it a good cleaning and start with the following simple tips for styling:
- A Wall Focal Point
Adding a ‘hero piece’ on the wall above your sideboard/console is a no-brainer because it is going to create a focal point. A stunning mirror, artwork/print or a 3D piece like a juju hat will draw one’s eye and decorate an otherwise plain wall space.
Once you have decided what you will place above your console, your next decision is where to position it – centre or off-centre. Here there really isn’t a ‘right’ way to go, it all depends on what looks better with the rest of the decorative pieces that you will use. You may want a symmetrical or asymmetrical balance – both can look beautiful – I would suggest a symmetrical composition for a more classic look and an asymmetrical positioning for a more modern and relaxed composition.
- Decorative Items
After choosing your wall focal point, it is time to pick a range of items to be displayed on the sideboard. An easy rule of thumb that many interior designers follow is to select things that vary in size so that you have a good mix of shapes, textures and heights. This creates a good balance and visual interest to the spectator.
- Height – Adding height is one of the most important elements of the décor items as it will help balance out the long dimensions of most sideboards/consoles. My favourite go-to is a design vase with flowers or long branches. Other choices can be a design table lamp or plant. Usually, this feature will be positioned in a way to slightly overlap the wall art/mirror, creating a visual connection.
- Medium – Often these are sculptural elements such as large candle, upright books, succulents, decorative picture frame or medium-small sculptures.
- Low Details – These can be a string of beads, a small stack of books, pretty bowls, small candles, shell or corals – or any other small object you would like to display.
Once you have gathered all the elements, arrange them in front of the wall focal point to create your composition. I would argue against having everything sitting in a straight line. Instead, create some depth by placing larger items further back and bringing smaller items to the front. The key to styling everything together is to group a few objects together.
Bellow are some examples for inspiration!
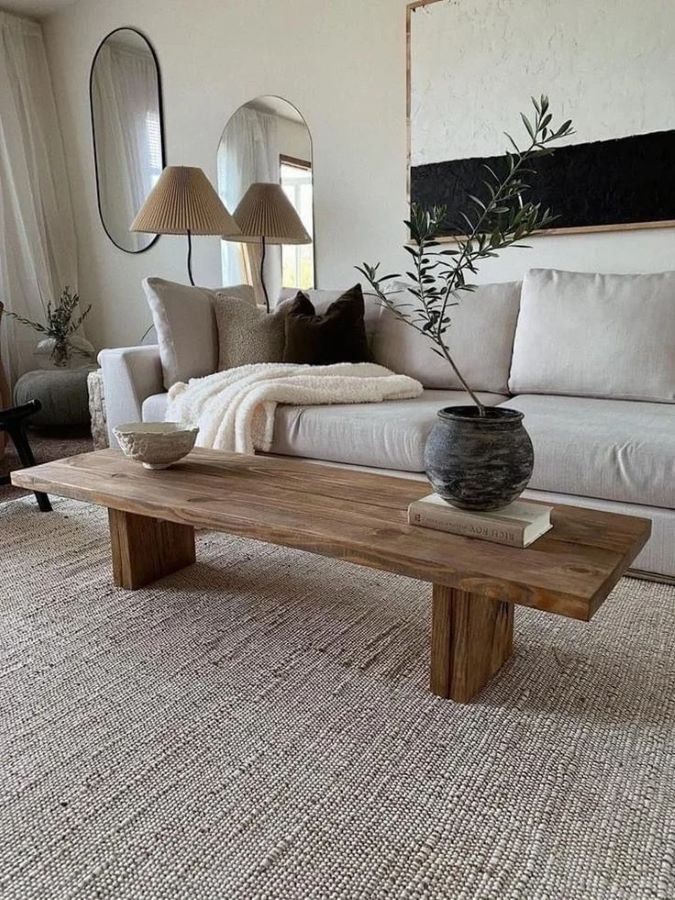
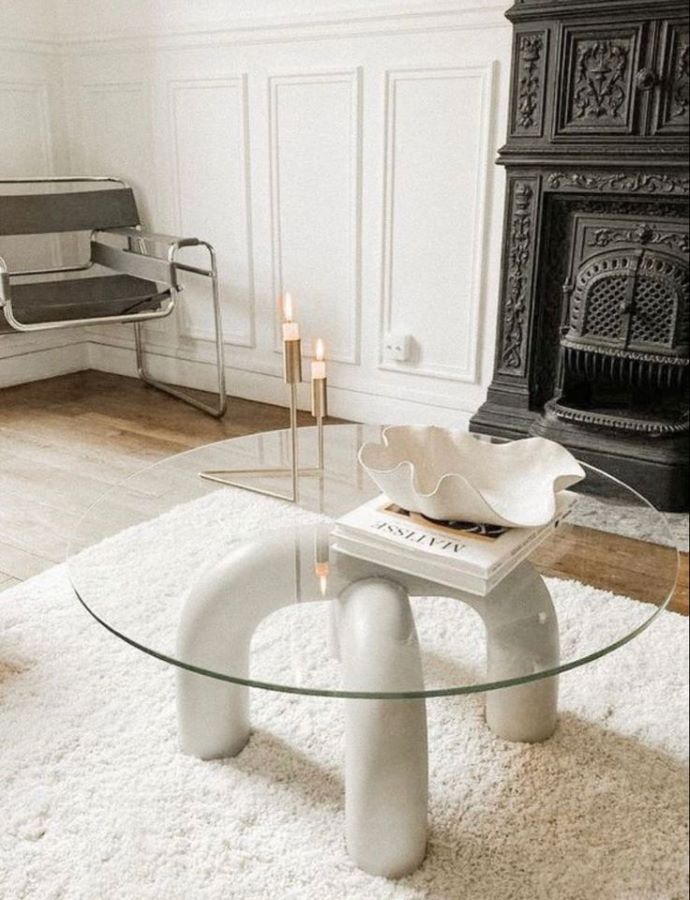
2) Curate Your Coffe Table
By now I am sure you have come across those beautifully decorated coffee tables often seen in add campaigns, magazines or even celebrity house tours and wondered why your table doesn’t look that amazing. Well let’s change that!
- Choose Your Height
When choosing what pieces you will style your coffee table with, first think about the height. I really like it when there is a vase with tall flowers or branches (olive, almond or eucalyptus) to add height to the table, make it a focal point.
- Use 3 Or 4 Pieces
Now this ultimately depends on the size of your coffee table but as a rule of thumb 3-4 pieces will work well most of the time. A stack of books will count as one piece, a decorative bowl can be another. Smaller items such as an aromatic candle or a decorative sting of beads will also add character to your table.
Ultimately you want to go for pieces that have character and you love, and it is always good to add natural stones (a marble tray) and wood (either the table itself or a beautiful vase/sculpture etc) to mix textures and natural colours.
I’ve seen coffee tables that are absolutely packed with styling items; however, I personally prefer to leave some breathing space on the table to retain its practicality (be able to put a glass down) and refrain from clutter.
- Work In Harmony With The Rest Of The Room
I always recommend to style your coffee table last – once everything in the room is in place. This will help you make sure that the colours, materials and textures of the items on the tale will work well with the rest of the room. You want to opt for elements in a similar colour palette as the room with only 1-2 key objects popping out, yet tying in harmony with the rest of the space.
Oftentimes I will add a touch of wood for warmth or brass/copper for a bit of bling depending on what the room needs.
Time To Assemble
Once you have gathered all your items it’s time to put them together. Start by placing them at the centre of the table forming small compositions. I would opt out of simply setting everything in a straight line.
Play around with the items and see what works for you and our table. Successful coffee table styling comes down to grouping things that look good together. The benefit of styling is that you can always change it up as often as you wish to refresh the space and make it appear ‘new’.
Here are a few coffee table arrangements which might work for you!
3) Refresh Your Bed
In any bedroom the bed is a Major styling moment – the bed linens you choose will greatly influence how the room looks and feels. Nothing looks sadder than a bed with a simple duvet and two tired pillows. A gorgeous quilt, interesting textiles and fluffy throw pillows are all items that will enhance the look of your bed and give a multidimensional look to your bedroom making it feel both chic and cozier instantly.
Sheets – When it comes to colour you can never go wrong with WHITE. Of course, if your vision board and style call for colour, go for it! But if in doubt, white will always be right.
Valance – This isn’t for everyone but a valance is a decorative sheet that hangs under the mattress, designed to hide the bed base of an ensemble. Think back to the old days – your grandmother might have had a frilly valance around the bed, but these days there are many simple, modern designs to suit everyone. This particular addition will elevate the look of the bed and ultimately make it cosier.
Throws – Toss a beautiful blanket on the bed to add another layer of texture and colour. For winter vibes opt for a chunky knit throw, but in summer go for a lighter linen fabric.
Throw Pillows & cushions – This is where you can bring in a little more personality to the bed, through pattern, texture and print. If you are unsure of how many pillows you should use – when it comes to double, queen or king size beds my answer is anywhere from 5-8!
For instance, a typical layering would be like so:
- you can have 2 large decorative ‘headboard’ pillows in the back
- your regular sleeping pillows in front of those
- two decorative design cushions in front of your sleeping pillows
and a long round cushion at the very front
4) Give Life To An Empty Wall
The walls of your house are the biggest and oftentimes emptiest surface area. Now don’t get me wrong, I too love a more minimal look around the house, however, there a few wall areas around which ultimately can benefit with a little styling to make your space look bigger (mirrors), brighter (artwork) or even more homey (pictures and/or drawings).
Location – First you must choose which wall you want to work with.
- Staircases and hallways are great decorating wall areas as they can otherwise be very empty and boring
- Large living room walls can also be of interest creating a mural of colours and textures to bring character to an otherwise basic space
Medium – Next you want to choose the type of medium you want to display
- Posters: are a cheaper alternative to artwork and can really add character to your space. You want to make sure the print images have high resolution and the theme/colours match the aesthetic of your vision board
- Art: a classic choice for wall decoration, you can really play around with the style, texture and theme of the artwork(s) to create a fabulous gallery wall.
- Children’s Art: there is no better way to add a personal touch to your space than displaying your kids’ art on your walls. The key is to find a minimal frame (preferably in a neutral colour – white!) and have them displayed in a ‘gallery’ wall style. This will be sure to brighten up your day every time you go past them.
- Photos: these can be personal and/or professional images. For a more curated style opt for black and white photos with a thin simple black or white frame.
- Decorative fans/juju hats/wall objects: here you can get really creative with the type of display you want to create. Make sure that the overall textures and colour are cohesive with each other.
- Mirror(s): mirrors can really enlarge a space and create an interesting synthesis when grouped together. I would advise to go for similar style mirrors for a harmonious look i.e. metal framed mirrors, vintage gold frame mirrors or borderless mirrors.
Once you have decided on the location and medium you wish to display it is time to measure the space you have. This will help you determine how many images/items you can display and you can plan out their positioning.
A few tips to keep in mind:
- Usually, the average eye height of focus is at about 1.50-1.60m above the floor level and so any piece that goes up on the wall should refer to that measure as its centre height.
- If you are creating a gallery wall (be it posters/art or photos) it is best to keep the same distances between the frames all around – a rule of thumb is 3-4cm at most to create a visually pleasing end result
- Thin (1-2cm) neutral colour frames (think white, black or light wood) work best to fade out in the overall scheme of images when choosing to display more than 2 items
- For a more interesting visual effect choose images and frames of varying sizes
Below are a few images to inspire you!
Sorry, the comment form is closed at this time.